
Spring Crafts 1/2/2022
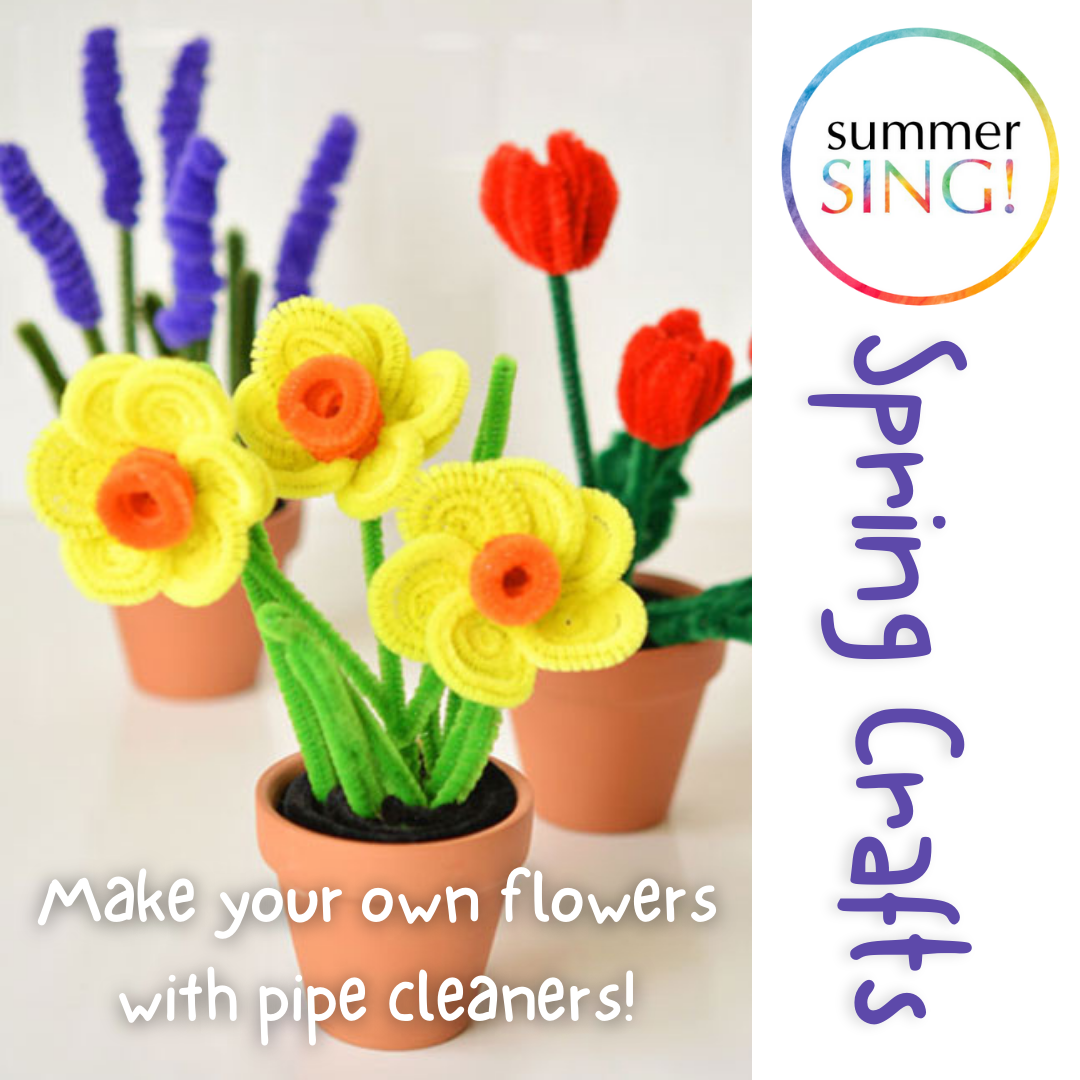
Make your own flowers with pipe cleaners.
Hi guys, happy St. Brigid’s Day! What with spring in full swing and the promise of longer, lockdown-free days, we’ve got plenty pep in our step at SummerSING! HQ. We can’t wait for peeking buds and flowers in bloom - so much so that we thought we’d make our own in the meantime. And so, we’ve got another make & do tutorial for you: Pipe Cleaner Daffodils! This craft project really got us into the Spring spirit and we hope you can knock some floral fun from it too.
This craft project requires minimal prep. All you need to get started is
1 orange pipe cleaner
3 yellow pipe clearers
1 green pipe cleaner
Strong, liquid glue.
Scissors.
Pots (optional).
Start by folding each of the yellow pipe cleaners in half to find the mid point.
Then, open them back up and arrange them into a star, twisting them at the middle so they stay in place
Next, Take each end and roll it tightly like a snail. Keep winding it until you get to the centre:
Repeat until all the “petals” are rolled up and then arrange them evenly.
For the stem, bend about 1″ of the end of the green pipe cleaner into a “J” shape.
Loop it through the middle of the flower, twisting it on the bottom to keep it in place:
Take the orange pipe cleaner and start winding it tightly, again like a snail, but stop after a few rotations.
Then, wrap it tightly around your baby finger.
When it comes off your finger, pinch it tightly to compress the layers as much as possible
Then add a generous dab of glue to the bottom of the orange “cup”


And there you have it, spring daffodils that won’t wilt come warm weather, and a simple way to put down a rainy day (we’re still in Ireland after all) with the kids. To present the flowers, we used some plain ceramic pots and filled them with sand. That was certainly the messiest part of the process, so if you don’t want to embark on a cleanup operation, simply popping them in a small vase or mug is perhaps a better bet.
We made these flowers having followed a tutorial on a site called onelittleproject.com, which is a fab arts & crafts resource that we can’t recommend enough! They’ve got tutorials for a variety of pipe cleaner flowers (tulips were another fun option), but we thought that daffodils were most appropriate for this time of year and the leader to daffodil day. We hope you enjoy making these as much as we did, don’t be afraid to take some pictures and tag us online if you do follow this tutorial - we’d love to see your finished floral creations!
Looking forward to seeing you all at SummerSING! 2022 this July. Until then, keep an eye on our website for our next blog.
All the best,
The SummerSING! team.

Christmas Crafts 15/12/21.
Make your own ‘Elf of the Shelf’.
Hey guys, its been a while!
How are we all? We hope that ye are all starting to feel that little bit festive by now! With that said, this year is set to be a particularly challenging Christmas for a lot of us, so its totally natural if you’re not really feeling that Christmas cheer. What with the ‘unprecedented’ nature of these times (and yes, we’re beyond sick of saying it too), this Christmas is set to be a much quieter and potentially very lonely time for a lot of us; so, if you do have kids at home this year, make sure to make the most of it! Family time over Christmas can be so precious, and a great way to make it more memorable is through exercising some creativity - look no further, we’ve got just the thing for those holiday lazy days (pjs 100% required).
If you’ve got young kids at home, ‘Elf on the Shelf’ might be nothing new to you. A relatively new and unlikely Christmas tradition, the Elf on the Shelf tradition sees parents move a toy elf around the house each day so the children see it in a new location - having moved by magic, of course - when they wake. The whole idea is a tonne of fun for both parents and kids, so we decided to make some homemade elves for a more sustainable and unique take on this Christmas trend! Making these elves went down a treat at ours, and we’re here to share some instructions on how to make your own. This Christmas, it feels more important than ever to ensure that children get a sense of the Christmas magic. It doesn’t require a big budget or exciting plans - it happens at home first!
What do you need for your own Elf on The Shelf?
Card paper - we recommend the classic red and green, but why not branch out!
Glitter paper.
Small red buttons.
Cotton balls.
Optional - maybe your child would like to be the elf, which is more than valid. In this case, you’ll need a photo of your child’s face too.

3. Accordion fold 4 strips of paper for the arms and legs. Make the legs slightly larger than the arms. Trim the size of the strips if needed to make them smaller.

6. Cut out the photo head and glue the hat onto the head.
7. Glue the head to the top of the elf body.
Directions for how to make your Elf on the Shelf.
1. Cut out your elf’s shape. You will need card paper for the body, legs and arms. Use a different colour card for the mittens and boots. Use glitter paper is for the collar the hat.
2. Attach the glitter paper collar to the round body. Glue on 2 small red buttons

4. Glue the arms and legs to the body and attach the mittens and boots to the ends of the arms and legs.
5. Glue a piece of cotton ball to the bottom of the green glitter hat. Add the small white pom pom to the top of the hat.

And voila! Little elves for your shelves, each made with love. We got the idea for paper elves from thebestideasforkids.com, a website that’s well worth a look at for those rainy days with the kids. If you decide to recreate this make and do exercise at home we’d be so thrilled to see it! Do share your results with us if you followed this tutorial at home, we hope that it sparked a little joy and lots of Christmas excitement.
We hope that you all have a safe, peaceful Christmas,
All of us at SummerSING!